to use the proper orientation,
to copy and paste,
use decorative tiles...
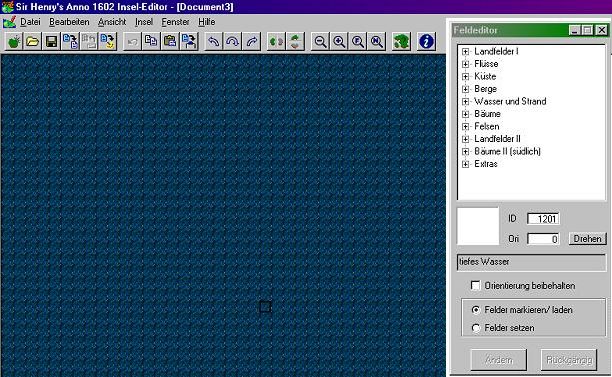
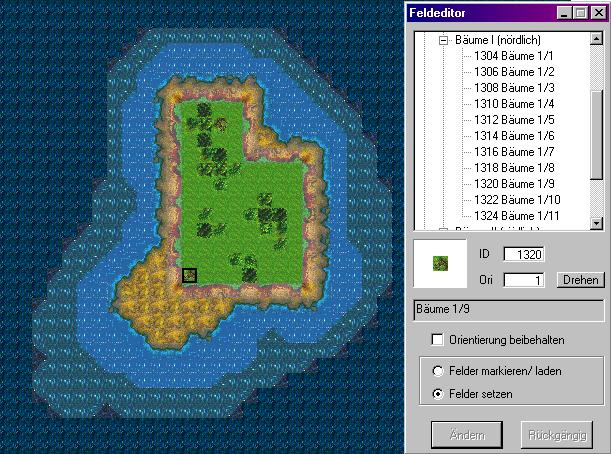
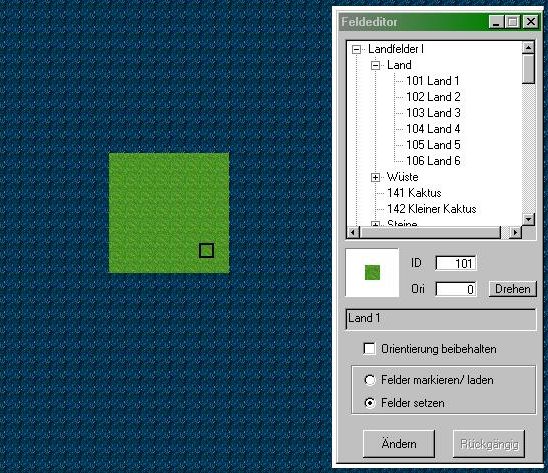
After you started the editor, click into the center of the editing window, in order to call the field-editor menu...
The menu has many directories and subdirectories. Choose " Land1 " among the landfields (tile # 101), activate the small box of " set fields " and draw a square of 8x8 fields into the large blue ocean using 'Land1'
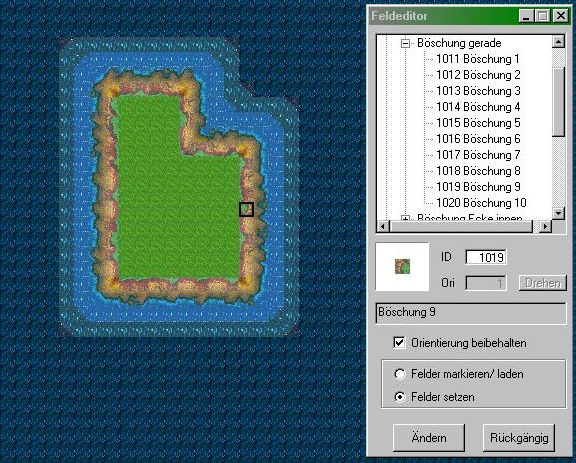
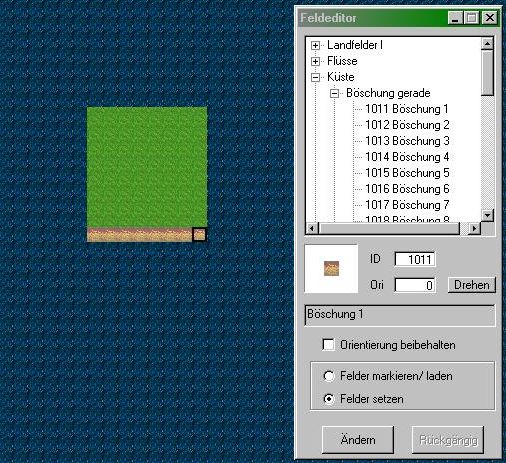
Now click the directory ' coast ' and move on
to the 'Böschung gerade' ('embankment even'), and select there the
first tile (# 1011)
In order to let an embankment in the south attach
ashore, the embankment must possess ' orientation 0 ', i.e., in the upper
there is still a bit of land, then follows the embankment, which changes
into the beach then. We will deal with orientation later, now first set
a number of the embankment tiles to the lower end of the land surface,
which you have created just before...
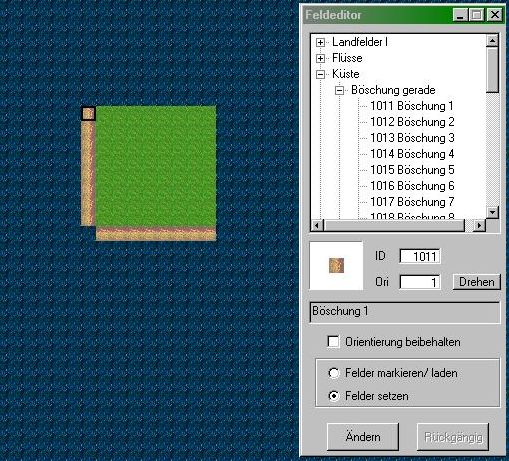
Now click on the button " turn ". With this you cause that the active tile is turned to the right by 90°.
Thus it has the proper orientation to set left ashore. So now put a set of embankment tiles in orientation 1 to the lefthand side of the country .
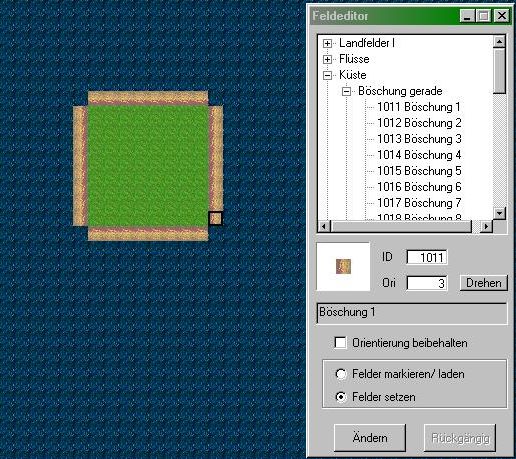
Now again click on ' turn ', on which the tile
now has orientation 2, and set a row of it to the top margin of the land
surface.
The same again with orientation 3 and we surrounded
our land surface with a series by embankment tiles.
Obviously now here still the ' corners ' are
missing...
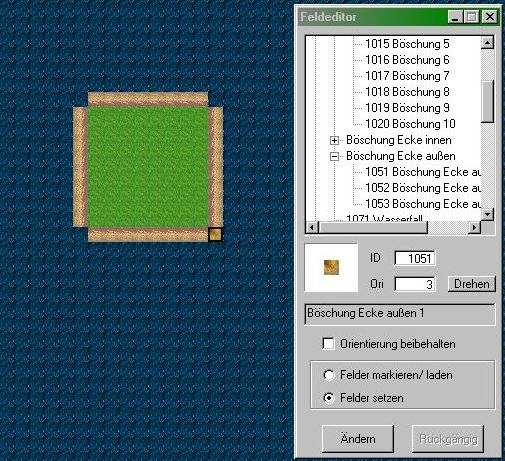
Click the directory ' coast ', look for 'Böschung Ecke außen' ('embankment corner outside') and select the first tile (# 1051)
From your last action orientation should be still ' 3 ', that is correct orientation to place the tile in the right, lower corner.
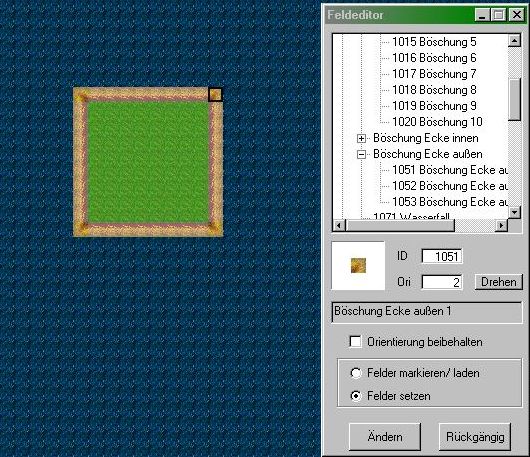
We set the other corners similarly. Click on ' turn ' and we have correct orientation for the left lower corner. Another click on ' turn ' and we can set the upper left corner,and in the end after repeated ' turn ' set the upper right corner.
At the latest now we should remember that one should SAVE regularly :)
Now let's have a look at our artwork once in the ANNO editor.
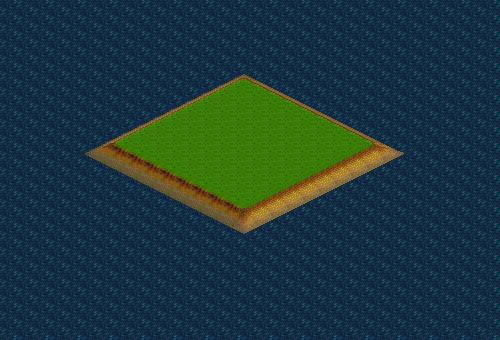
Not bad at all... but now back to the islandeditor...
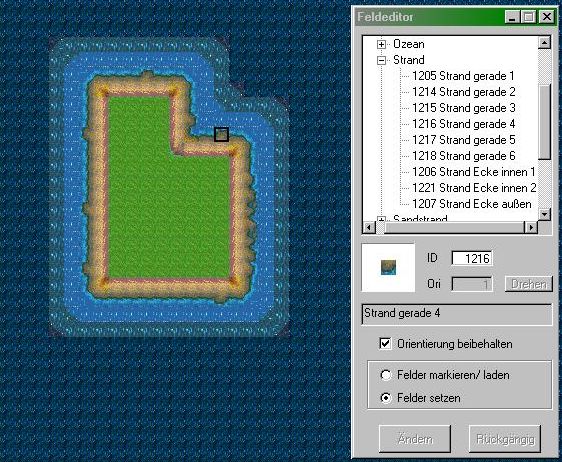
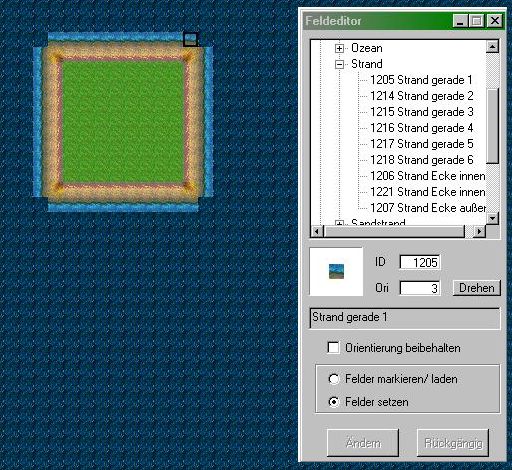
Next the 'Strand' ('beach') is set.
To do so we click in the directory 'Wasser und
Strand' ('water and beach'), look for 'Strand' ('beach') and select the
tile 'Strand gerade 1' ('beach even 1') (# 1205). It may be a little irritating
at first that the ' orientation 0 ' at the beach-tile is that on the right
part is water and on the left a part beach. But with more training you
will soon get the hang of it...
Similarly to the previous actions we thus first
attach a series of beach tiles in ' orientation 1 ' to right edge of our
island,
then the lower series, the left and the upper
ones...
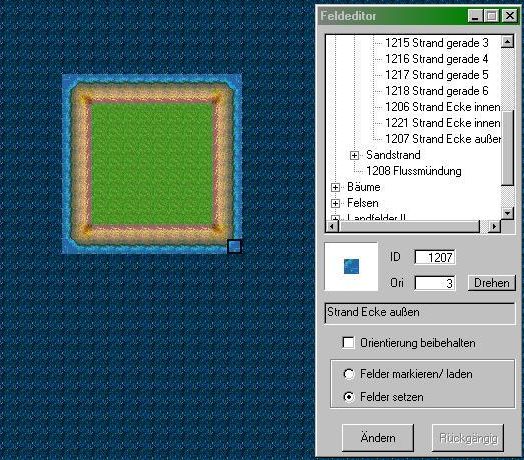
Now we come to the beach corners...
Select (the onliest) 'Strand Ecke außen'
('beach corner outside') tile (# 1207).
Orientation 3, which should be active at the
moment, is the tile for the right, lower corner.
As used we turn and set the other three corner
tiles, too
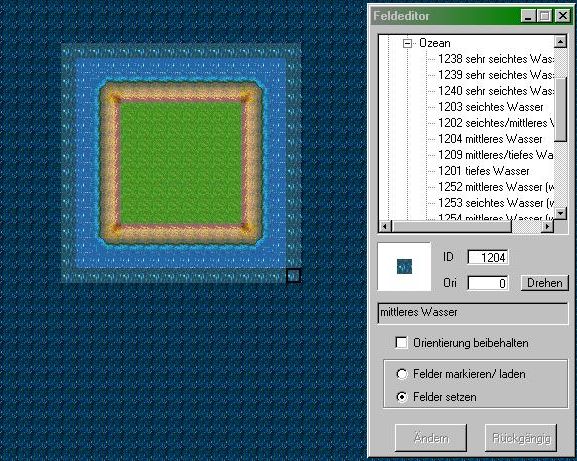
Now we come to the subdirectory 'Ozean' ('ocean') and select there 'seichtes Wasser' ('shallow water', # 1203).
With this bright blue we draw a first frame around our island...
Then we select 'mittleres Wasser' ('middle water' # 1204) and draw another frame with this darker blue...
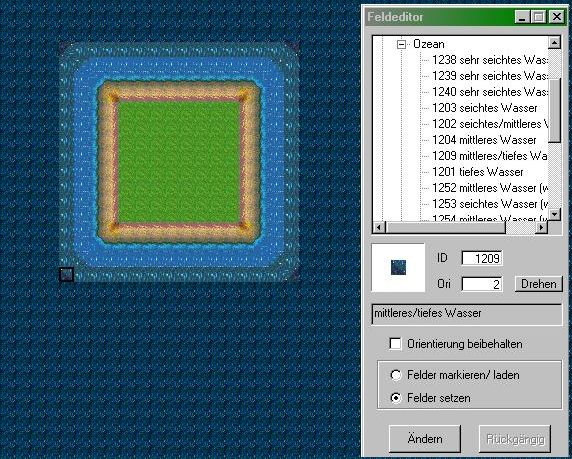
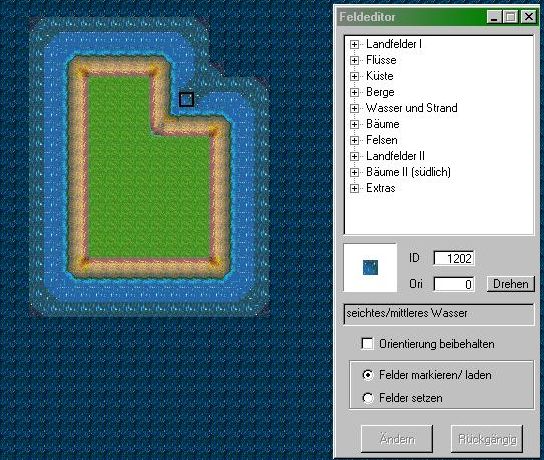
In order to round the edges of shallow and middle
water a little, we use the mixed tile 'seichtes/mittleres Wasser' ('shallow/middle
water' # 1202)
and 'mittleres/tiefes Wasser' ('middle/deep water'
#1209). You should be able now to set these tiles yourself...
a tip, in orientation 2 the tile fits into the
left, lower corner.
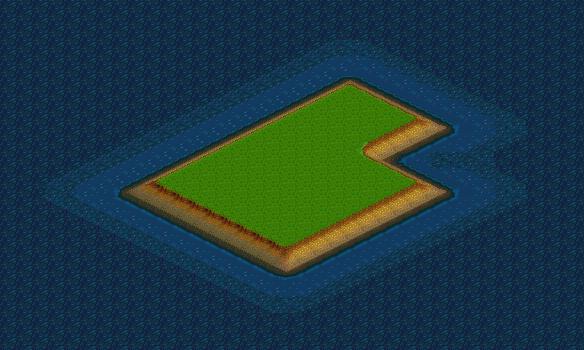
And thats how our island looks like in the ANNO editor:
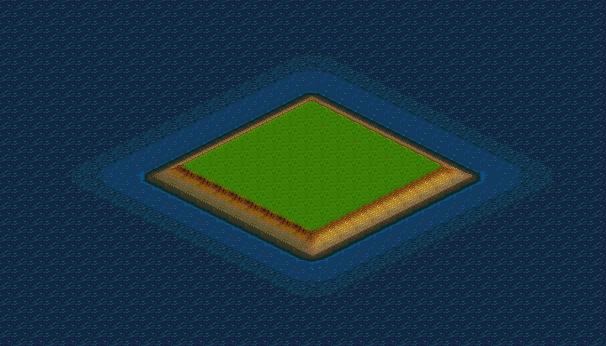
Nice... not awefully nice, but ... well, let's
go on!
Now we come to the most important characteristic
of the editor (in my eyes) and this is: copy and paste.
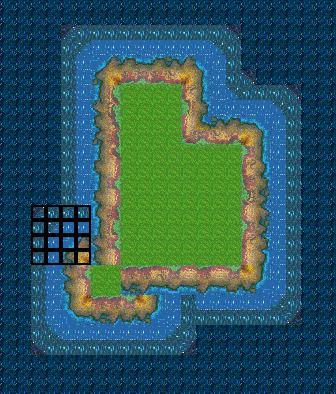
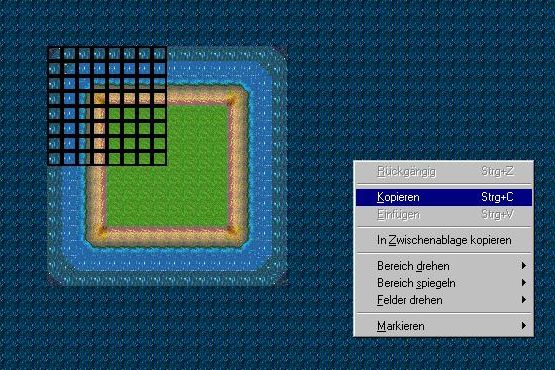
Our still square island achieved the extents
of 16x16 fields in the meantime.We now mark the upper, left 8x8 section.
That can be done either through clicking and
pulling (drag&draw) or by setting the left upper point, hold the shift
key and setting the right lower point.
A right-mouse-click calls the context menu. Select
'kopieren' ('copy') there.
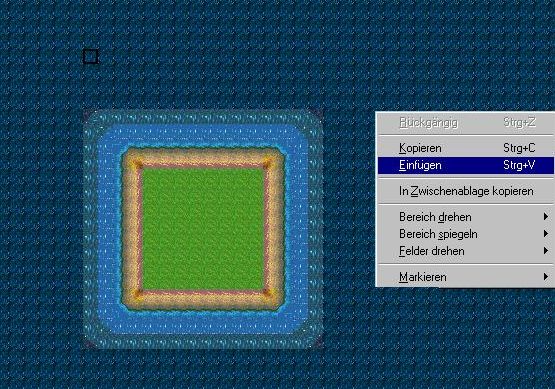
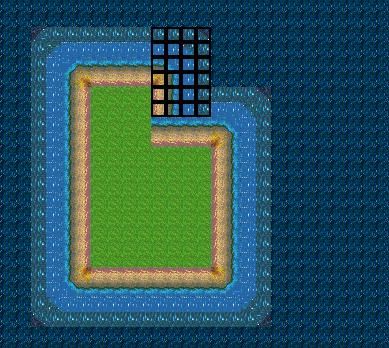
Now we mark the point of 4 fields above our island
and orient ourselves at the lefthand side of our artwork.
Another right-mouse-click and select 'Einfügen'
('paste')...
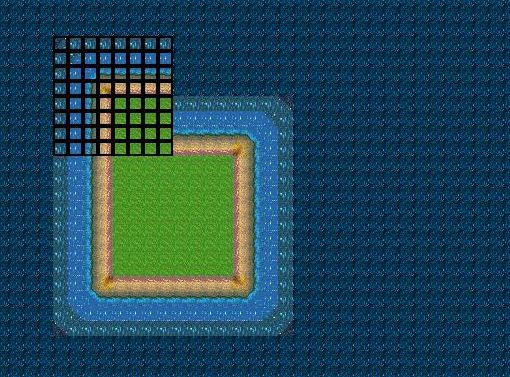
The results...
Aha... and you thought, we would have to set EACH field individually :)
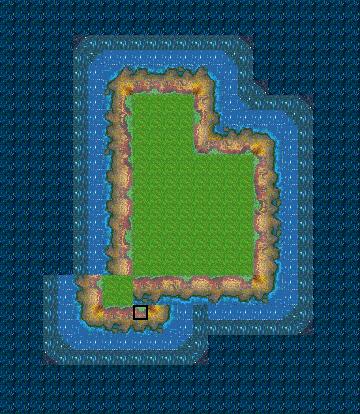
To complete the island we still need another right upper corner here, a right edge and a corner inverted inward...
Therefor we mark and copy a range of 4x6 fields at the right upper corner of our island like shown below.
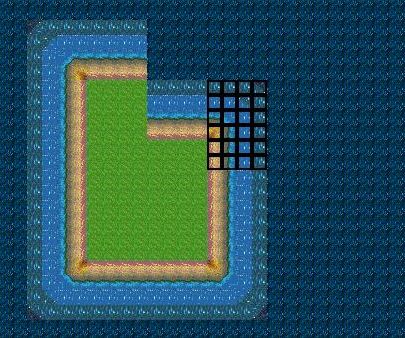
We place the copied section directly beside our beforehand inserted section like shown below, and have thus already the necessary right corner and right edge. Now still missing is another correction to the embankment, beach and shallow water...
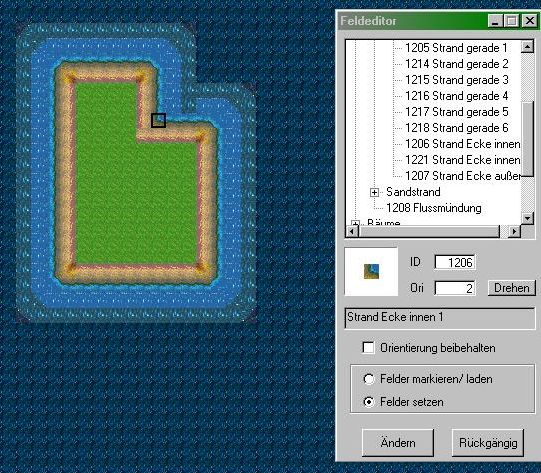
In the sublist 'Wasser und Strand' ('water and
beach'), in the directory 'Strand' ('beach') we select the first 'Strand
Ecke innen' ('beach corner inside') tile (# 1206)
The orientation of the tile must be ' 2 '.
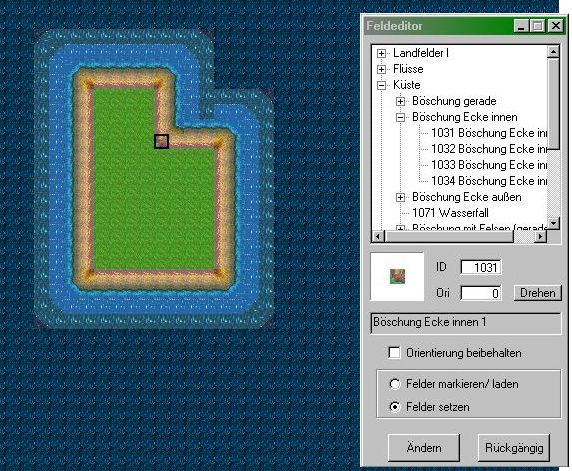
Similarly to this we need now a 'Böschung Ecke innen' ('embankment corner inside') from the directory ' coast '
We select the appropriate tile (# 1031) and set it in orientation ' 0 '
You should in the meantime be able to repair the shallow water...
Afterwards it could look like this...
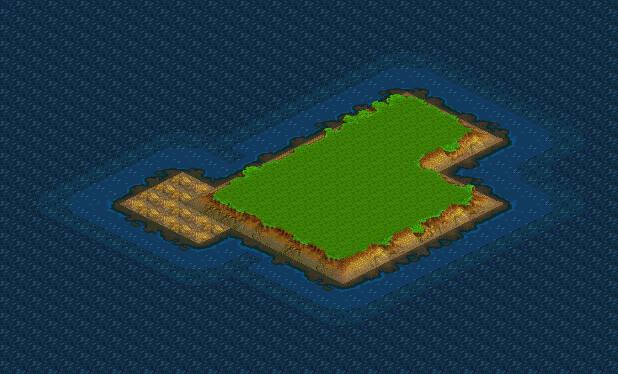
We wanna have a look at it in the ANNO editor
(save first!)
Ahha... already better! However - it still is too "smoothly"...
Therefore we will have a look at a few alternative
tiles now...
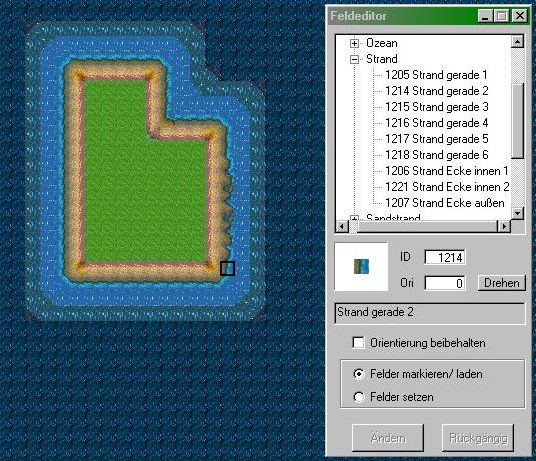
We select the directory ' beach ' and there we
select 'Strand gerade 2' ('beach even 2'). This tile we place at the right
edge of our island, as the second, even beach field. As the third we set
' beach even 3 '... and so on until we set ' beach even 6 '. Then we go
upward in the selection again setting 'beach even 5 ' and then ' beach
even 4 ', ' beach even 3 ' and finally ' beach even 2 '.
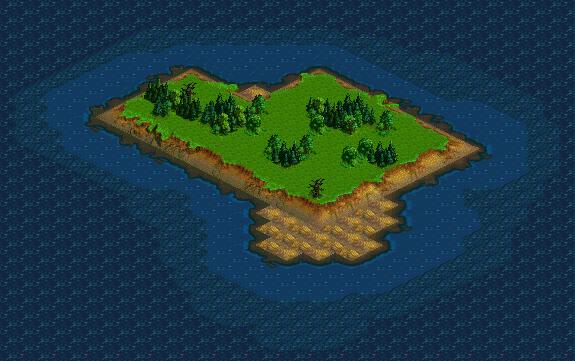
Now it already looks " more naturally " in the
islandeditor...
We are now anxious to see the result in the Anno editor...
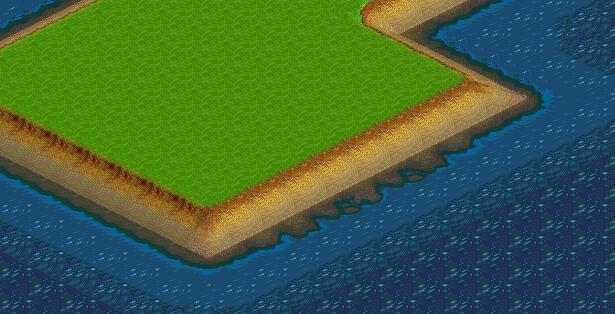
hmmm... yeah... not bad, isn't it? :)